Fact is, everyone knows that establishing your own credible and secure email server is a real pain. Maddy does make it easier. However, their installation instructions left out some important points. I hope at this time to simply improve the instructions to make it simpler for the next person.
Environment is AWS. GCP will not work as they block some of the outgoing ports.
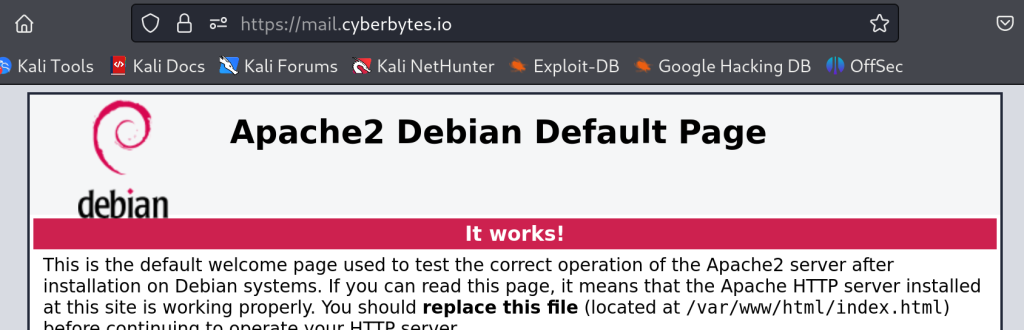
The DNS information pertains to a domain name called cyberbytes.io. This domain name is not in use today.
Basic Server Creation with Encryption Keys
As this is for a small company I am setting this up on a Debian 12 Linux server as a micro sized instance. If the mail server needs more horsepower, I can upgrade it later. However, I don’t think that will be necessary for some time. Before creating the mail server, we need it to be a functioning web server with TLS encryption installed.
Furthermore, I have established my own VPC for this company (optional). The VPC is enabled to support IPv4 and IPv6 and I configure both IP versions on the server. I am giving it a storage space of 30 GB keeping this simple for now and within the free tier.
For the security group, and am opening the following ports:

After the mail server is well functioning and I have worked through the bugs, I will shut off ICMP, and the insecure communication ports such as 25, 80, 143, and all of the ICMP openings that are there only for troubleshooting during setup. Port 587 is not a standard port in the aws security group setup, yet it is used for the Submission service which is a newer name for a secure smtp service.
Next task is a basic apache mail server and to install Let’s Encrypt on that apache server. That will give us the security certificates needed for Maddy to work in an encrypted environment. As you should be aware when working with AWS, you need to be able to connect to the server with the proper security key with an SSH shell. My presumption is that you already know how to do this. Teaching you how to make an SSH connection to your newly built Debian 12 server is beyond the scope of this tutorial.
Also, don’t forget to assign yourself an elastic IP address and assign it to the new mail server. And then update your DNS records to include the A and AAAA records for your server. A for IPv4 and AAAA for your IPv6 address. I am using Route 53 to host the DNS.


Make certain you assign a permanent elastic IP address after provisioning the server.
Install Apache2 and the Security Certificate.
$ sudo apt-get update
$ sudo apt-get install apache2
$ sudo apt-get install snapd
$ sudo snap install --classic certbot
$ sudo ln -s /snap/bin/certbot /usr/bin/certbot
$ sudo certbot --apache
Now when you type in the URL to the server as in http:/mail.example.org, you will now see the default apache screen and it will have a security certificate assigned to it.
While you can leave apache alone and let it be, I prefer to change it to something less interesting such as a blank screen. You may be tempted to place a web client in this spot; however, I recommend against this as you will have too many competing resource destined to make your troubleshooting world difficult.
Set up Maddy
We are going to install Maddy from the source code.
$ sudo apt-get install golang-go
$ sudo apt-get install gcc
$ sudo apt-get install libc6-dev
$ sudo apt-get install make
$ sudo apt-get install scdoc
$ sudo apt-get install acl
$ sudo apt-get install net-tools
$ wget -4 https://go.dev/dl/go1.23.4.linux-amd64.tar.gz
$ sudo chown 777 go1.23.4.linux-amd64.tar.gz
$ tar -xf "go1.23.4.linux-amd64.tar.gz"
$ export GOROOT="$PWD/go"
$ export GOPATH="$PWD/go"
$ export PATH="$PWD/go/bin:$PATH"
$ sudo apt-get install git
$ git clone https://github.com/foxcpp/maddy.git
$ cd maddy
$ git checkout v0.7.1 (latest release as of the time of this writing)
$ sudo ./build.sh
$ sudo ./build.sh install
$ sudo systemctl daemon-reload
Now create the Maddy user and group.
$ sudo useradd -mrU -s /sbin/nologin -d /var/lib/maddy -c "maddy mail server" maddy
Next we need to modify the maddy.conf file located at /etc/maddy/madd.conf. Use your favorite linux editor. I personally am happy to use the VI editor.
$ sudo vi /etc/maddy/maddy.conf

You could at this point add multiple domains in the (local_domains) after the $(primary_domain) location; however, I would not do this at first. Get the basics of your server before adding complexity.
Since we already used Let’s Encrypt to generate the signed certificates, now we need to make them useful to Maddy.
$ sudo setfacl -R -m u:maddy:rX /etc/letsencrypt/{live,archive}
Start the Server
$ sudo systemctl start maddy
If all goes well, then it will start with now error message. If you get an error message, then investigate by typing $ sudo systemctl status maddy.service.
After starting the server, I ran a netstat -a command and see the following:

User Creation
Now you need to make certain the server is really working by creating a user. Make certain you change the domain name to your domain name.
$ sudo maddy creds create postmaster@example.org
$ sudo maddy imap-acct create postmaster@example.org
You could try sending an email now; however, the mail server or provider may reject the email. At best, it will arrive and end up in the spam folder. Don’t send very many as reputation management is very important for your newly functioning mail server. Now work on getting your DNS settings all working. This is not a trivial task.
DNS Settings – A, AAAA, and Reverse DNS
First thing I need to point out is that most DNS servers like to make use of the @ symbol. AWS Route 53 does not work with the @ symbol and instead want the value blank. This is particularly important for your A and AAAA records. Nevertheless on the mail server, the @ symbol is irrelevant as as we are working with a subdomain.

While documentation for Route53 claims that I can create two PTR records for the subdomain / mail server, I found that not to be the case so I only have the reverse DNS setting set up in IPv4.

SPF Record
This is a very simple setting:

In addition to the SPF record placed in here, I also did a domain site verification with Google using the same TXT record. The site verification is optional.
SPF is simple one spoofing prevention mechanism available. There are additional spoofing prevention mechanisms. You need them all in place to prevent your email from being rejected.
MTA-STS Record
This one took some digging for me to get it right as it literally requires you to spawn another virtual server so that your record will match independently from what the DNS states. This is a more stringent approach than simply the SPF record. I found that Comcast email had no problem communicating with my mail server without mta-sts. However, Google refused to communicate until I had it set up correctly. I was able to send to Google. However, all of the Google originated emails would not arrive until this test passed.

I had to spawn a new very basic Apache2 webserver making it a subdomain of cyberbytes.io. So while my mail server is mail.cyberbytes.io, the mta-sts server is a subdomain of the primary domain name, not of the mail server.
Use the same instructions given at the beginning of the post to create an apache2 webserver with a TLS certificate.
$ sudo apt-get update
$ sudo apt-get install apache2
$ sudo apt-get install snapd
$ sudo snap install --classic certbot
$ sudo ln -s /snap/bin/certbot /usr/bin/certbot
$ sudo certbot --apache
Once your new webserver is installed, you need to add a new file called mta-sts.txt placing it in the /var/www/html/.well-known/ directory. It should look like this – of course changing your mail server address.

The word “testing” is important. It should remain this way for two weeks. After two weeks, once all of the bugs are worked out, change it to “enforce”.
The word testing should result in you receiving emails from other servers informing you of information pertinent to your setup.

Next, you need an _mta-sts entry which does two things:
1. It matches the version value between DNS and the Server.
2. It gives a set and tracked age for the entry to signal to the mails servers when the mta-sts values are changed. So the id in the DNS entry is best to match the date and time you last touched it the values on the webserver.
As said previously, my communication with the Gmail based servers would not properly communicate until this was properly set and Google needed a half a day to reconcile it.
SMTP and DMARC Settings
Notice the SMTP entry is tied to the mail server domain name. It is giving an email address used for others to send you reports.

The dmarc entry tells where to send reports of quarantined emails.

CORRECTION: p=reject is the required value.
DKIM
DKIM is integrated with the Maddy Mail Server. You have a key located at /var/lib/maddy/dkim_keys/example.org_default.dns. You need to copy that value out of the mail server and put it into the dns. However, the string is too long for the Route 53 AWS dns. So you have to break up the value to be separated by spaces and surrounded with ” ” symbols.
I had issues getting a copy of the key from the server as the copy and paste from the terminal was not working for me. So I copied the file down to my laptop using scp. From my local computer, I was able to create the DNS entry.

Notice that the entry is tied to the mail server, not the domain name.
The number was too long for Route 53. So I had to break up the large number with spaces and put ” ” markings to separate the values. To not put line breaks between the quotation markings. In fact, create your entry on a text editor with no line breaks, and copy and paste it in.
It may sound like a security breach to tell you the security value, but it is in the DNS, so its already breached.
Email Client
On my iphone, I found the Edison Mail client to be very effective as a client. On Kali Linux, I use Thunderbird which works, but it very old school and I am looking for something better. Nevertheless, the mail server now works perfectly.
Also, I do not recommend placing a webmail client on top of the mail server. If you want to install a webmail client, I recommend you create a new sub-domain on an independent server.
Conclusion
It was a bit of a learning curve to get the Mail Server working. But it was a fun project. After using this server for a few days, I am quite happy with it and intend to migrate emails of other domain names to it. Perhaps my favorite thing about it is that the user accounts are tied to an email address including the domain name. Now I can run all email addresses I own on one server and that will save me money.
Not covered in the scope of this report are High Availability and DNSSEC.